The Sweet and Meaty Taste Science of Grilled Vegetables

The Sweet and Meaty Taste Science of Grilled Vegetables

The Sweet and Meaty Taste Science of Grilled Vegetables

“Let’s grill tonight” translates to “let’s eat meat tonight”

in many backyard BBQs. It’s not surprising since grilled meat products create hundreds of complex aroma and flavor compounds. Grilled vegetables create less of these craveable compounds but develop delicious flavor profiles that can make them popular with kids and adult “veg-avoiders.” Whether using wood, coal or gas heat sources for grilling meat products or vegetables, the flavor differences are determined by browning reactions that depend on carbohydrates and protein.

Vegetables and meats exposed to high heat in a dry environment develop unique flavors from non-enzymatic browning reactions known as the Maillard reaction and caramelization.

Caramelization relies on sugar for creating tasty molecules whereas, the Maillard reaction requires protein and a hint of sugar for flavor development.

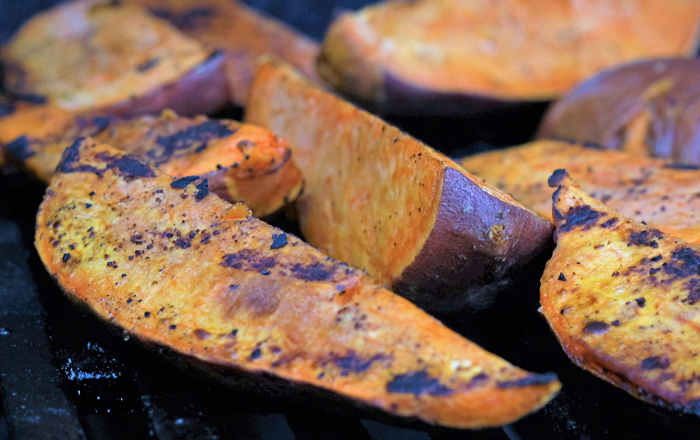
grilled sweet potato

Flavorful Proteins

Vegetables meet two of these Maillard reaction requirements; however, the low protein content compared to meat products limits the flavor development. Meat, poultry and fish, when exposed to a high and dry heat, yield hundreds of complex Maillard aroma and flavor compounds ranging from savory and meaty to floral and earthy. Because meat products also include the simple sugar ribose, some caramelization flavors also may be detectable.

Flavorful Sugars

Caramelization is a browning process from heating sucrose or sugars such as fructose or glucose, also known as reducing sugars. Caramelization requires higher temperatures than Maillard reactions. Annette Hottenstein, Sensory Scientist and Registered Dietitian, explains that grilling typically exposes vegetables to higher heat than other cooking methods and at these high temperatures, new complex volatile flavor components become available as natural sugars caramelize.

Caramelization flavor compounds are less complex than those from Maillard reactions, but don’t disappoint with a flavor range that includes butterscotch, sherry, rum or toasty notes.

Vegetables with high levels of reducing sugars and protein such as corn, sweet potato, onions and eggplants create tasty flavors from both types of browning reactions.

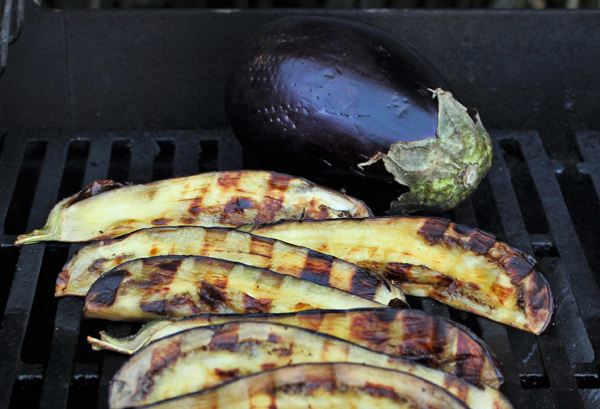
Veg grilled Eggplant Michele Redmond

“Meaty” Grilled Vegetables

Like meats, some vegetables can develop a “meaty” taste element thanks to sulfur. Vegetables with an amino acid linked to sulfur such as cysteine create more savory elements or a meatiness. Cysteine is plentiful in cruciferous vegetables and alliums like onions.

Cysteine found in onions and combined with naturally high sugar content transform onions on the grill but also explain why caramelized onions are popular additions in many meals.

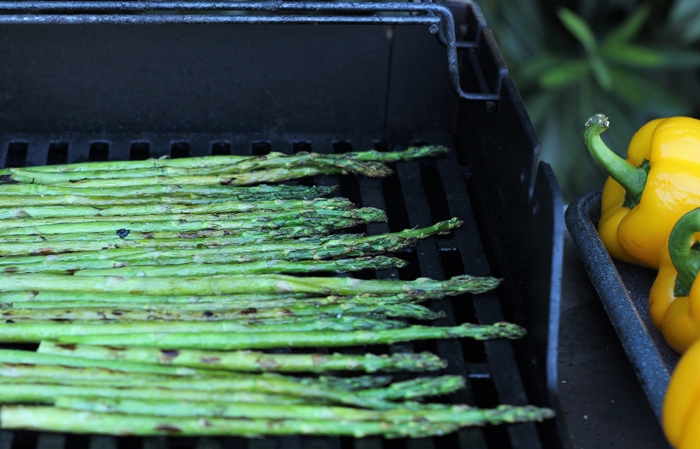
Grilled vegetables also offer pleasant contrasting textures. Hottenstein shared that she particularly enjoys the crispy tips of grilled asparagus and how the heat of the grill intensifies the green flavor components while adding a smoky dimension.

Veg grilled Asparagus

Vegetable Grilling Tips

Here’s some veggie grilling flavor techniques to make “let’s grill tonight” translates to “let’s cook delicious foods” where vegetables are hogging the grill grate.

  • Fresher is better: Some vegetables, like sweet corn, rapidly convert natural sugars to starch after harvest. Less natural sugars result in less flavor and sometimes a mealy texture
  • Par-cook: For dense or slow-cooking vegetables such as carrots or potatoes, partially pre-cook then grill or grill the surfaces for color and flavor, then finish cooking on the warming rack.
  • Coat or naked: Dry the surface of vegetables before coating lightly with oil or a marinade. Or instead grill them naked like whole eggplants or peppers for smoky, charred skin aroma compounds.
  • Veggie densityVegetables such as zucchini, eggplant, tomatoes that are less dense due to high water content grill quickly in general and even faster if sliced or quartered. It’s best to not mix them with dense vegetables, such as root vegetables, to ensure even grilling results.
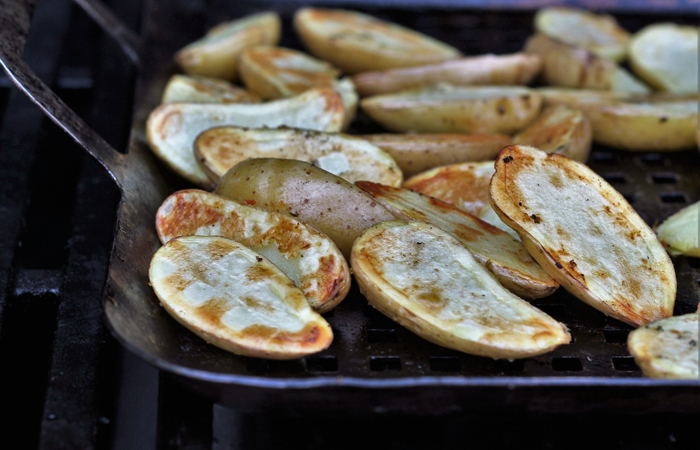
grilled potato fingerlings | Tasteworkshop.com

    About Me

    The pleasure of food, good health and well-being through simple habits for eating well and flexitarian low-key cooking.
    Michele Redmond

    Michele Redmond

    French-trained Chef, Registered Dietitian Nutritionist & Food Enjoyment Activist

    It's about Making Food First

    Get Eat Well Academy periodic updates on easy ways to choose and cook foods that satisfy your appetite, nurture your body and make eating well a pleasure.

    Corn, Tomato and Spinach Olive-Oil Galette

    Corn, Tomato and Spinach Olive-Oil Galette

    Corn, Tomato and Spinach Olive-Oil Galette

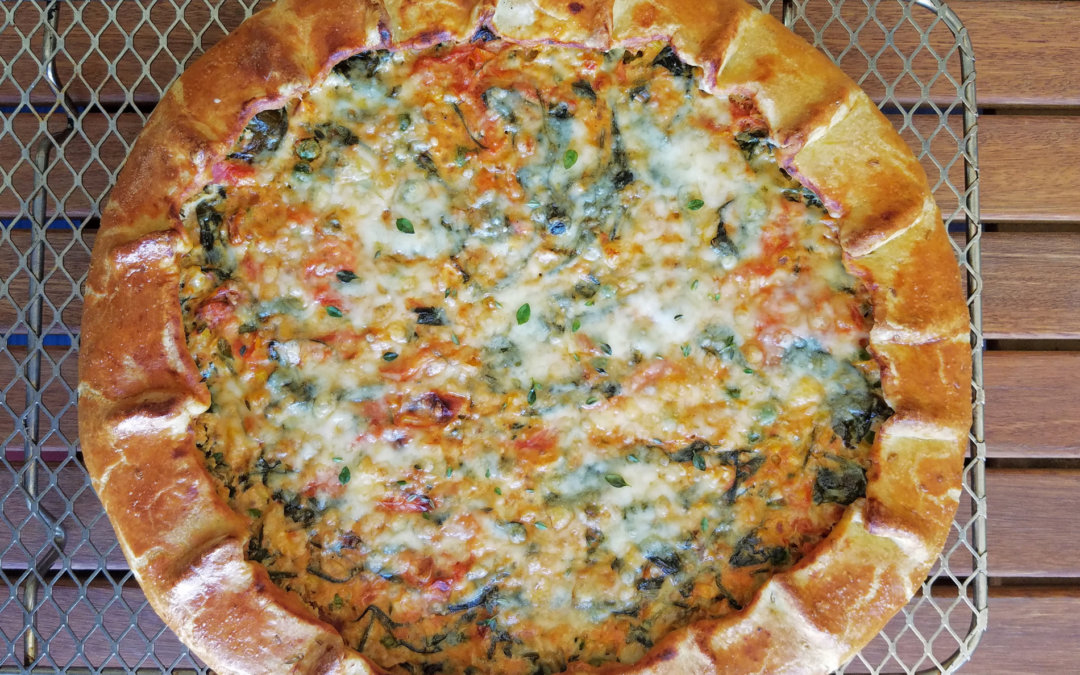
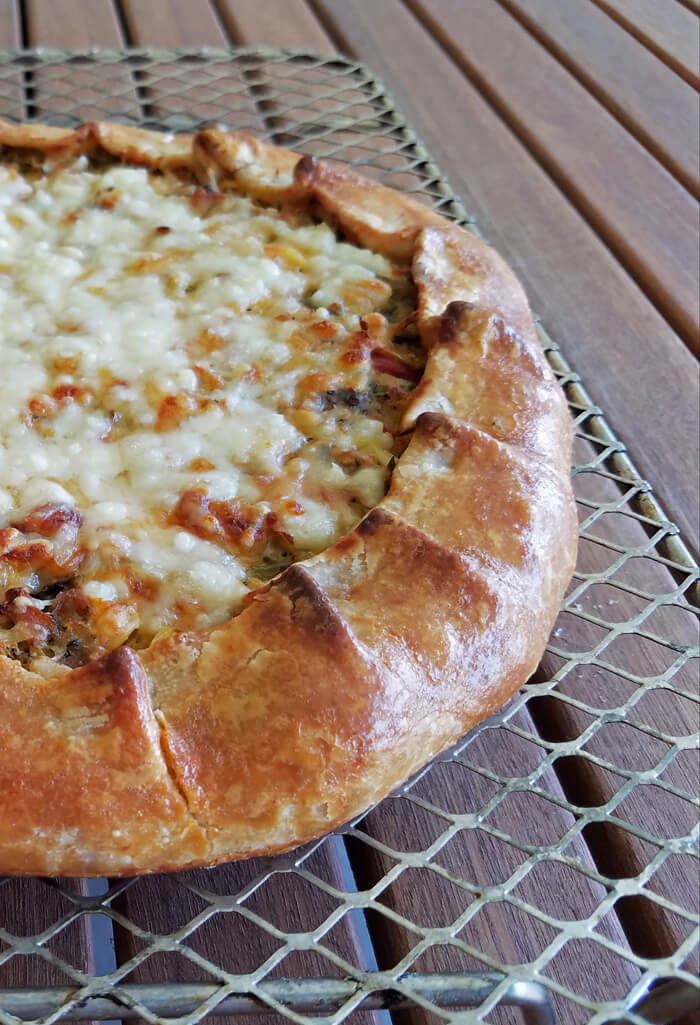
    Olive-oil galette–Is it a tart? A pizza with a folded edge? A pie you eat for dinner?

    Olive-oil Galette

    It’s delicious no matter what you call it and, depending on your fillings, this olive-oil galette works for breakfast, lunch or dinner.

    This quick, easy tart base can be made anytime with basic pantry ingredients since butter isn’t a primary ingredient. It works as a weekday meal but fits many occasions from picnics (simply eat slices by hand) to an elegant dinner with wine and real silverware.

    Another advantage of adding an olive-oil galettes to your menu, other than sounding fancy French when you say “Galette” (a French word that actually sounds like it looks), is how easy it is to prepare for all eating styles from plant-only to eat everythingtarian.


    Corn, Tomato and Spinach Olive-Oil Galette

    Serves 12 as appetizer or 6-8 as a meal with a side

    Crust Ingredients

     2 cups all-purpose flour
    ½ teaspoon salt
    ½ cup fresh-grated parmesan
    ½ cup extra-virgin olive oil
    ½ cup plus 1-2 tablespoons ice water

    Optional: Add 2 teaspoons toasted fennel seed or 1½ teaspoon toasted cumin seed

    Galette Filling
    2 teaspoons olive oil
    12 ounces grape tomatoes, cut in half (about 2 ½ cups whole)
    2 ears corn kernels (about 1¼ cup or 1 can drained and dried)
    3 large garlic cloves, minced fine
    ¼ teaspoon red pepper flakes
    1 teaspoon fresh thyme, minced (or ½ teaspoon dried thyme)
    ¼ teaspoon salt
    10 ounces (about 8 cups) spinach
    Optional: ½ cup fresh peas, blanched in salted water
    4 eggs, prepare one for egg wash
    ¾ cup ricotta
    1 cup grated gruyere (2.25 ounces), divided

    Crust Steps:

    1. Add flour, salt, parmesan and any spices to a food processor; pulse until blended. Pour in olive oil while pulsing to mix into flour, you may need to break up large clumps. Then slowly pour in ½ cup cold water. Dough will start to pull away from sides and clump together, but if not, add a bit more water up to 2 tablespoons. Dough should feel smooth, moist but not tacky. Remove from food processor.
    2. Knead dough for about 30 seconds then form into a ball. Press the ball of dough into a disk and wrap in plastic wrap. Refrigerate for 30 minutes or up to 2 days maximum or freeze for later use.

    Filling and Tart Steps:

    1. Heat a large skillet over medium-high heat, add olive oil. When oil is warm, add halved tomatoes, corn, garlic, pepper flakes, thyme and salt. Cook 8-10 minutes to reduce liquid. Add spinach, use tongs to toss to evenly wilt it—about 2 minutes. Remove from heat, let cool.
    2. Preheat oven to 375˚ Line a large baking sheet with parchment paper or coat one with olive oil. Place dough a floured counter, press the disc to flatten enough to roll out with a rolling pin. Sprinkle some flour on the dough or rolling pin and roll from the center towards the edges to create a circular, but imperfect, shape about 15” wide and ¼ inch thick—look for an even thickness overall. Pick up an edge and lift it to over the pin (think curtain rod) to lift the dough and place flat on the baking sheet.
    3. Mix together 3 eggs, add ricotta and all but ½ cup of gruyere, add cooled cooked ingredients, mix.
    4. Pour mix onto the center of the dough, spread it within 2 inches of edge. Fold dough border up over the filling either in small square sections or pleated sections. Brush the dough with egg wash.
    5. Bake 30 minutes, then top with the remaining ½ cup gruyere. Bake another 10 minutes or until crust is golden brown and center feels firm. Let cool before serving.

    Serving options:  Serve warm or at room temperature. Stores well for 3-4 days before crust begins to soften or break down.

    Related Recipe: Here’s another recipe that could be a tart or pizza: https://eatwellacademy.com/corn-and-cremini-chickpea-cauliflower-pizza/ 

      About Me

      The pleasure of food, good health and well-being through simple habits for eating well and flexitarian low-key cooking.
      Michele Redmond

      Michele Redmond

      French-trained Chef, Registered Dietitian Nutritionist & Food Enjoyment Activist

      It's about Making Food First

      Get Eat Well Academy periodic updates on easy ways to choose and cook foods that satisfy your appetite, nurture your body and make eating well a pleasure.
      Salsa! Dance it or Eat it—Both Burn Calories

      Salsa! Dance it or Eat it—Both Burn Calories

      Salsa! Dance it or Eat it—Both Burn Calories

      Dance it or eat it, but either way salsa boosts your mood, makes you hot and burns extra calories. Chile peppers in salsa contain chemicals that trigger heat sensations and cause your body to expend more energy–a metabolic effect called diet-induced thermogenesis (DIT). Embrace salsa as a quick condiment or ingredient to make sassier foods that give your body a metabolic boost for burning calories.

      Making Salsa & How Chile Peppers for Burn Calories

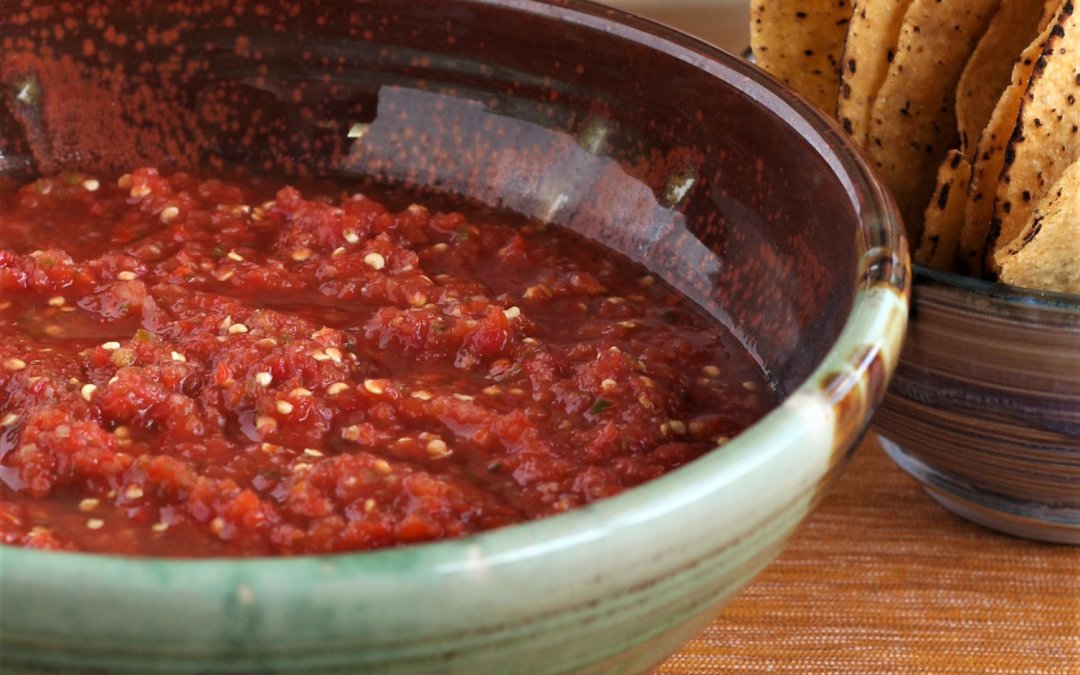
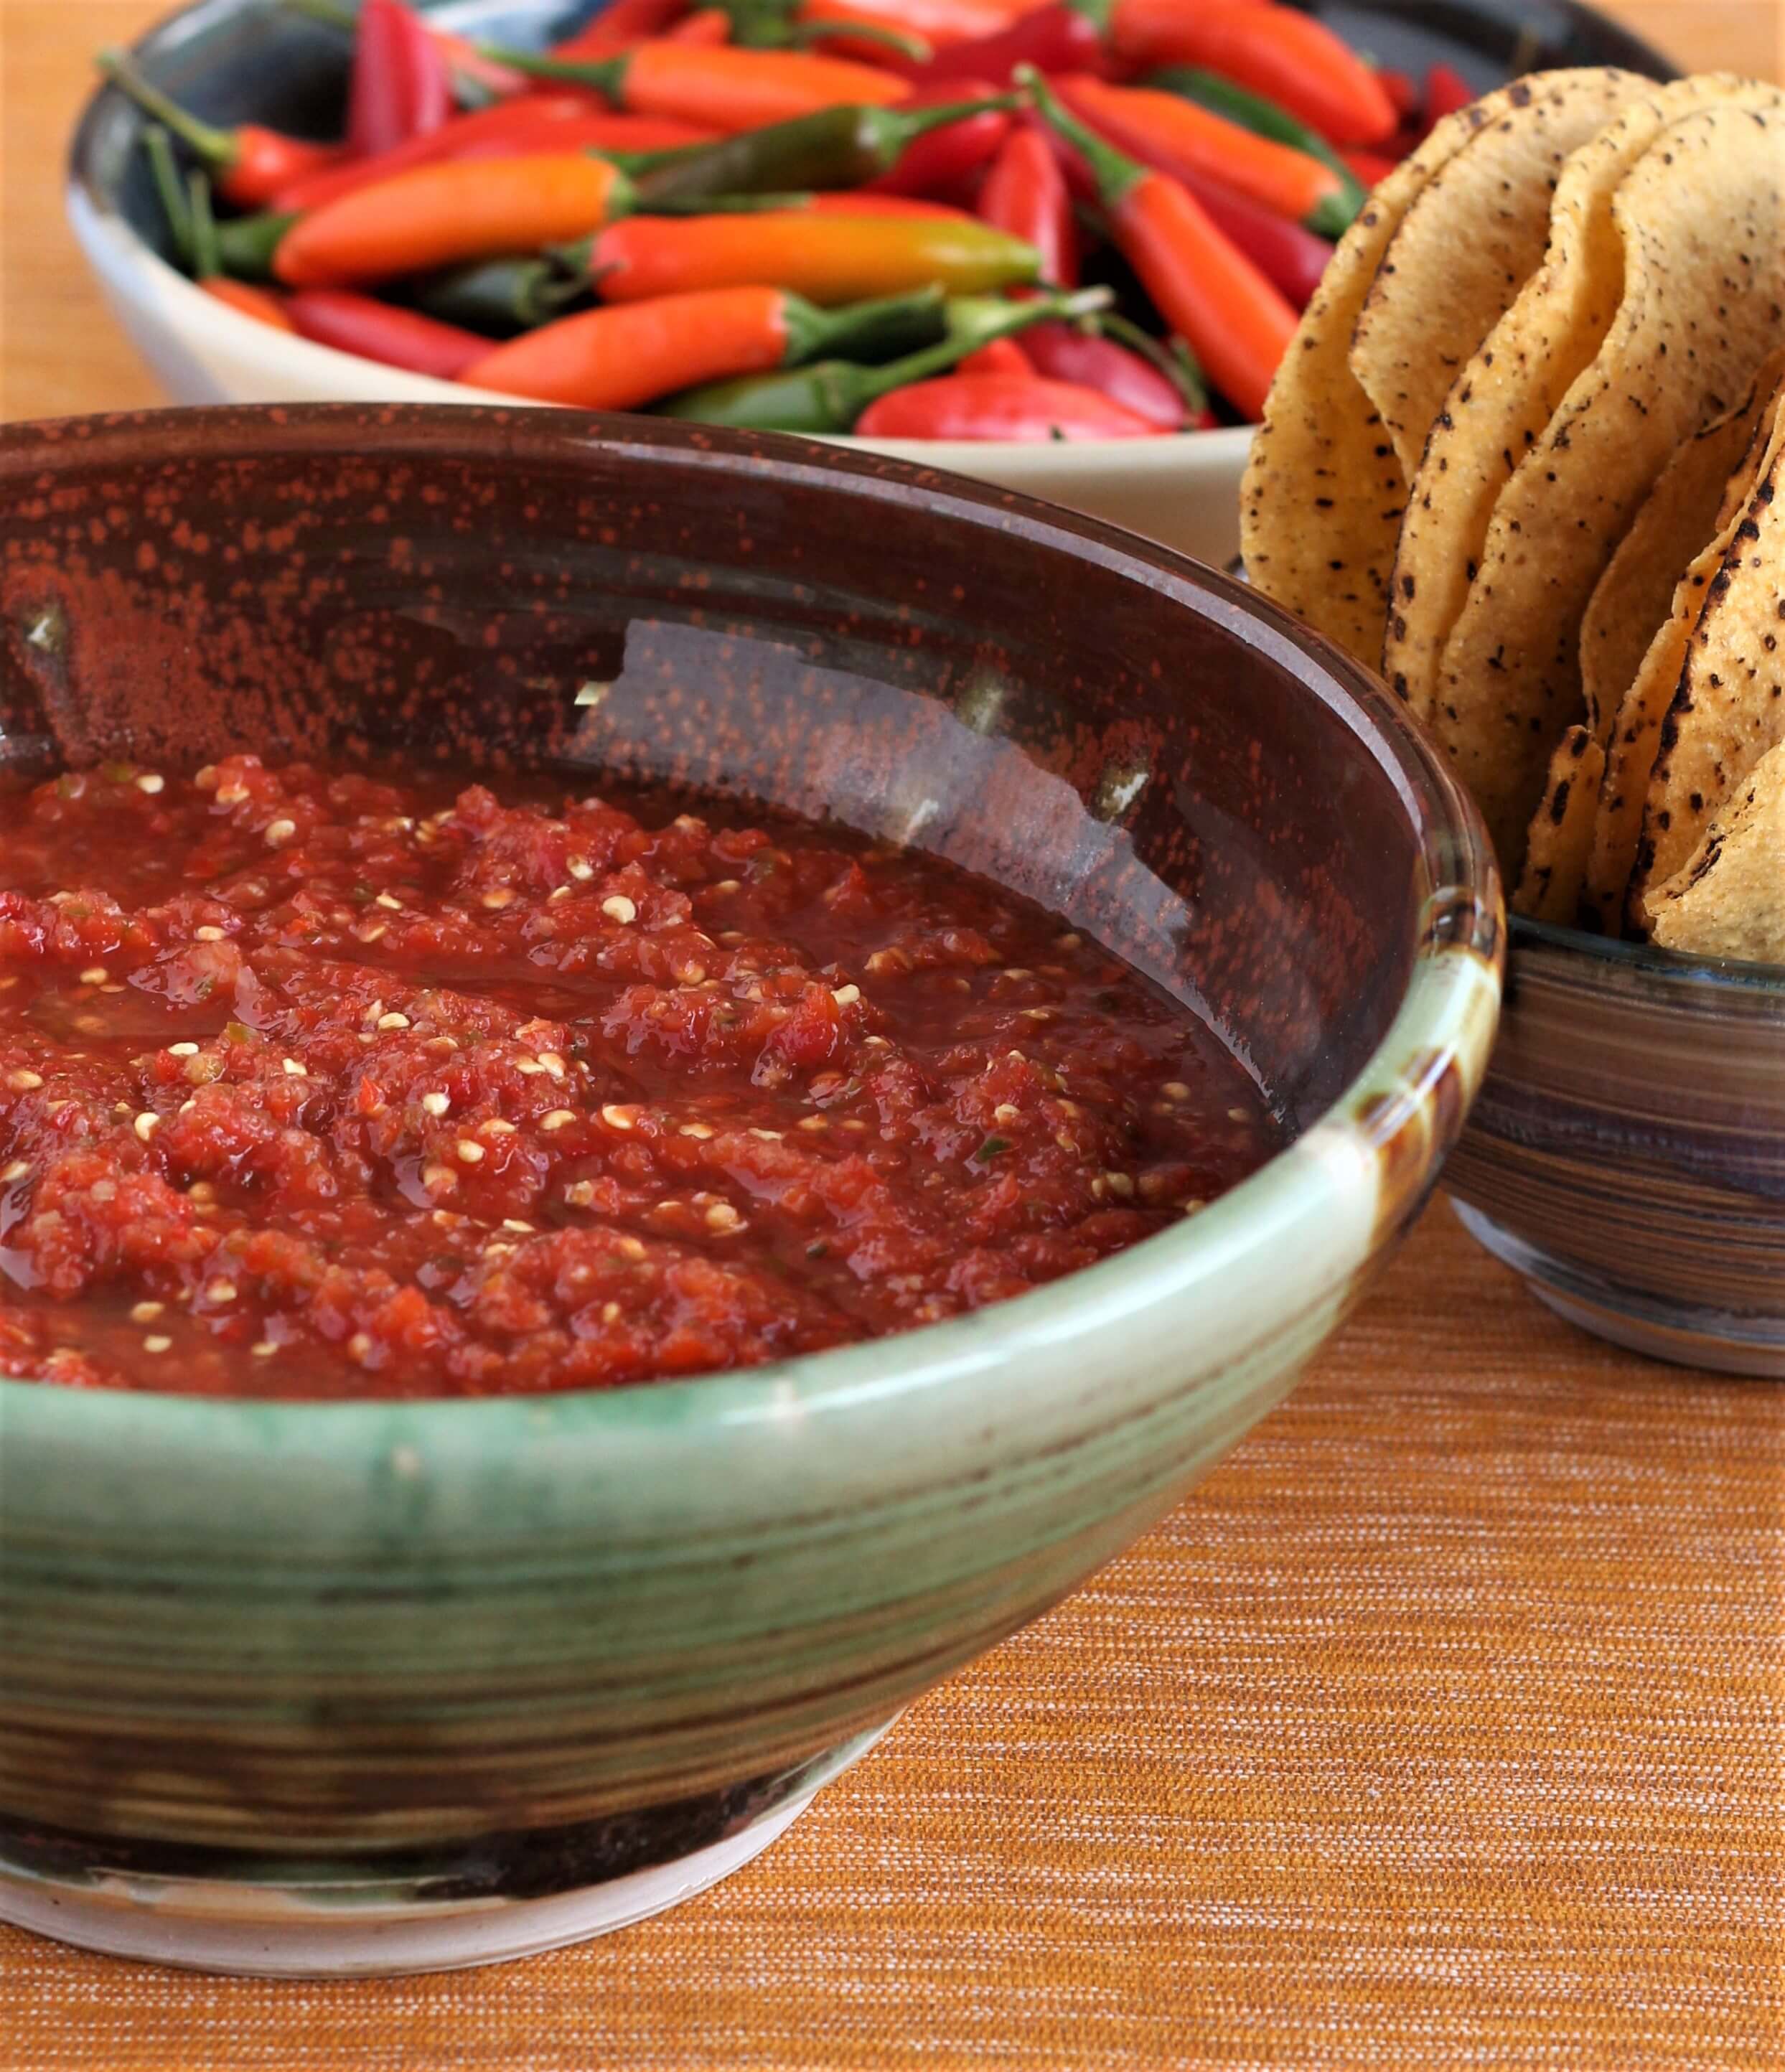
      Fermented salsa made from my garden serrano chile peppers

      Popular in the United States as a dip, in many dishes it’s the sauce, no surprise since salsa is the Spanish word for sauce. It typically relies on savory, umami-rich tomatoes as the base, but fruits add fresh, sweet flavors that complement many dishes.

      Salsa ingredients can be grilled, raw, pureed, diced or pounded out in a molcajete. The only rule to making salsa? You must include chile peppers–not spelled chili (a meaty dish).

      Salsa “Burn”–Blame the Vein

      Contrary to popular myth, the spicy heat from chili peppers caused by capsaicinoids, is not concentrated in the seeds, but primarily in the inner fibrous veins, or the ribs of the peppers. Chemicals in capsaicinoids, like capsaicin, induce thermogenesis causing your body to expend more energy.

      Diet-induced thermogenesis occurs when specific compounds in foods (capsaicin in chile peppers) or beverages (such catechins in green tea), help the cells convert energy into heat which burns calories. Depending on the mix of nutrients, such as carbohydrates, fats and protein consumed at meals, diet-stimulated energy expenditure can range from 5-15% of total energy expenditures for the day.

      Consider making salsa a weekly part of your menu by stocking up on:

      Serrano Chile peppers and burning calories by diet-induced thermogenesis

      Serrano chile peppers from my desert garden


      • Salsa base ingredients: Raw tomatoes, raw tomatillos or grilled, braised, roasted versions of either and canned fire-roasted tomatoes can be a nice option.
      • Chile peppers: Serranos are my favorite choice because of the size and fruity profile they have compared to jalapenos which tend towards grassier, bitter notes. Serranos have more capsaicin (3-4 times more) than jalapenos and both come in red and green but serranos also are available in orange and yellow. Gauge the amount of chile peppers by taste, but also check out the Scoville levels as a guide.
      • Aromatic or savory ingredients: Garlic, ginger, yellow onions, red onions, sweet onions, shallots, scallions, cilantro
      • Sweet ingredients: Corn, pineapple, watermelon, mangos, apples, peach, strawberries, cherries, etc.
      • Tangy ingredients: lime, grapefruit, lemon, vinegar, pickled veggies

      Want to get some hot tips on handling chilies and creating fast, flavorful salsas? On my Facebook Live cooking show, I’ll demo how to make a quick canned salsa that doesn’t taste canned and a fruit salsa that is flexible for many different dishes.

      Live Salsa Making on my Make Food First Cooking Show:

      Facebook Live IconJoin us on Facebook Live May 23rd 1 pm PT or 4 pm ET

      Where? @TheTasteWorkshop Facebook page


      Want a beverage twist on chile peppers? Click here to get my cranberry citrus chili spritz in Food & Nutrition Magazine.

      For more on how to spell Chile Peppers, Check out the Chile Pepper Institute N.W. University

      For more info on Diet-Induced Thermogenesis: DIT & total energy expenditure estimates

        About Me

        The pleasure of food, good health and well-being through simple habits for eating well and flexitarian low-key cooking.
        Michele Redmond

        Michele Redmond

        French-trained Chef, Registered Dietitian Nutritionist & Food Enjoyment Activist

        It's about Making Food First

        Get Eat Well Academy periodic updates on easy ways to choose and cook foods that satisfy your appetite, nurture your body and make eating well a pleasure.
        Lentil Mushroom Walnut Pate: Savory Bean-Meat Swaps

        Lentil Mushroom Walnut Pate: Savory Bean-Meat Swaps

        Lentil Mushroom Walnut Pate: Savory Bean-Meat Swaps

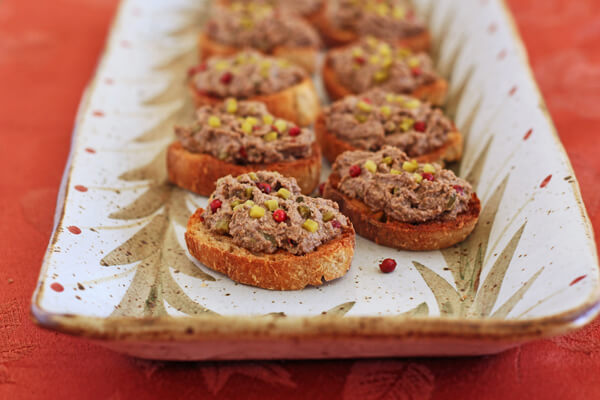
        Lentil pink peppercorn pateSwapping out a meat-based ingredient for a plant-based one is a balancing act of texture, taste qualities (like umami) and flavors from aromatic compounds. Particularly with liver—can you think of any plant that tastes or smells like it? Please let me know if you do.

        Liver is a cheap ingredient that many cultures embrace and adore but can be an acquired taste due to its strong odors, unique and sometimes metallic flavors and texture challenges. My first whiff of liver was thanks to my childhood friend Mary whose father regularly cooked the beef version as a breakfast “treat” on his favorite cast-iron pan.

        I dreaded being asked to try it, but never was asked. I didn’t taste liver until I lived in Paris, where you were expected to appreciate pâté.

        Pâté commonly uses chicken liver which has distinct poultry flavors, but this umami-rich lentil version is popular at parties among traditional pâté-lovers and non-meat eaters. Walnuts and mushrooms add texture and savory notes (particularly umami from plant-based glutamate). Cornichons and lemon add brightness, cayenne gives a hint of eat, Madeira offers a soupçon of sweet and pink peppercorns surprise with complex flavors like resin.

        Lentil Mushroom Walnut Pâté

        Makes nearly 2 ¾ cups

        Pate Ingredients

        ¾ cup dried green lentils (if using cooked about 2 cups)
        ¼ teaspoon salt
        1 cup walnut pieces (about 5 ounces), toasted
        1 tablespoon freshly squeezed lemon juice
        2 tablespoons reduced-sodium tamari
        1 teaspoon fresh minced thyme
        few pinches cayenne pepper (less than ⅛ teaspoon)
        2 tablespoons olive oil, divided
        12-14 (about 10 ounces) medium-sized cremini mushrooms
        ¼ teaspoon salt
        1 small onion, diced (about 1 cup)
        2 cloves garlic, minced (about 1 teaspoon)
        1 tablespoon Madeira or marsala
        8-10 cornichons, diced fine (about 3 tablespoons)
        1 ½ teaspoons pink peppercorns, lightly crushed

        Prep Steps

        1. Check lentils for debris, put in pot, add 3 cups water and the salt. Bring to a boil then reduce heat to maintain a rapid simmer for 20-24 minutes or until lentils are tender (more tender than if using in a salad). Drain well in a colander to remove excess water. This can be done a day in advance.
        2. Toast walnuts in a skillet. Add walnuts, lentils, lemon juice, tamari, thyme and cayenne to a blender.
        3. Clean and dry mushrooms and cut into 1/4”-1/2” thick slices. Heat 1 tablespoon oil in a large skillet over medium-high heat, add mushrooms and sprinkle with the salt. Cook without stirring until browned on one side (about 6-8 minutes), toss them and cook 4-6 more minutes. Add to blender.
        4. Reduce heat to medium, add remaining tablespoon of oil to the skillet then the onions and garlic, cook 4-6 minutes. Add madeira and sweat the onions about 6 more minutes or until onions are soft and liquids have evaporated. Add to blender and process pâté until smooth.
        5. Scrape mixture into a mixing bowl. Mix in one teaspoon of peppercorns and 2 tablespoons of cornichons. Use remaining ½ teaspoon of peppercorns and tablespoon of cornichons as garnish. Refrigerate until use, keep for 7 days in the refrigerator or freeze for a couple months.

        Pate Serving Options

        1. Serve pâté with crostini, baguette slices, toasts, crackers or on slices of cucumber.
        2.It also works as a sandwich spread or a filling to stuff cherry tomatoes.

        Other Veggie-Meat Swaps

        Try this other savory use of walnuts to mimic meaty-umami flavors in my walnut, mushroom ragout.

          About Me

          The pleasure of food, good health and well-being through simple habits for eating well and flexitarian low-key cooking.
          Michele Redmond

          Michele Redmond

          French-trained Chef, Registered Dietitian Nutritionist & Food Enjoyment Activist

          It's about Making Food First

          Get Eat Well Academy periodic updates on easy ways to choose and cook foods that satisfy your appetite, nurture your body and make eating well a pleasure.
          Quick Pickled Leeks with Lime

          Quick Pickled Leeks with Lime

          Quick Pickled Leeks with Lime

          Leeks are versatile, but most often, are cooked until soft or used as an aromatic veggie in stocks. This recipe for pickled leeks lets them maintain a fresh texture and flavor. In less than 10 minutes, hands-on, you have a versatile, delicious garnish and ingredient for multiple dishes.

          Many recipes for pickled leeks combine two acids, a vinegar and a citrus, typically lemon. In this recipe, lime is a perky final touch that pairs well with starch-buttery leeks. A hint of heat from garlic and mustard seed doesn’t suck either.

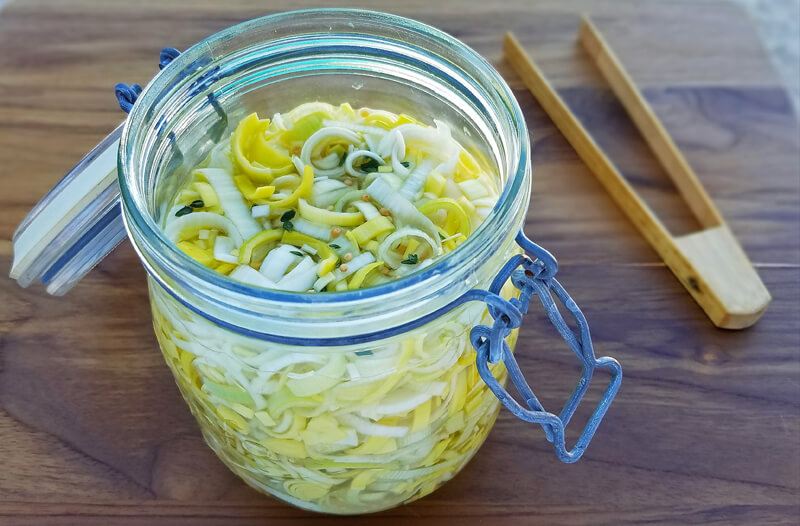
           Pickled leeks with lime

          Ingredients

          2 leeks, each about 1½ in diameter
          1 cup water
          3/4 cup champagne or white wine vinegar
          1 teaspoon fine sea salt
          2 teaspoons sugar
          3 garlic cloves, sliced thin
          ½ teaspoon yellow mustard seed
          3 sprigs fresh thyme
          3 tablespoons fresh lime juice (one large-sized lime)

          Steps:

          1. If the leeks are not trimmed, remove outer, tougher stalks, slice the root ends off and cut each stalk lengthwise in half. Under running water, fan the leek layers under running water or swish the halves in a bowl of water. Take each half and slice into moon-shapes about 1/4-inch thick (about 4 cups leeks when done.) Add to a pickling jar, glass or ceramic container.
          2. In a small saucepan over medium-high heat, combine the water, vinegar, salt, sugar, garlic and mustard seed. Bring to a boil and add thyme. Remove saucepan from heat and leave for 4-5 minutes or until you can discern a hint of thyme when tasting. Add the lime juice.
          3. Remove the thyme from the pickling juice then pour juice over leeks. Press leeks so the liquid just covers them. Add a couple tablespoons of water if needed and stir into leeks.
          4. Cool pickled leeks in the refrigerator uncovered, but cover when cooled to store. Since this is a fast pickle and not one done with long-term preserving methods, you can only keep in the refrigerator up to two weeks, but they won’t last that long!

          For more information on using leeks, their most excellent nutrient profile, why they work so well in stocks and how they star on their own in a dish, check out my article in Food and Nutrition Magazine on leeks.

          Pickled Leek Serving Options:

          Legumes and Veggies: use as a garnish on grilled vegetables and add to bean salads
          Grains: use an ingredient in grain or pasta salads to add textural interest and flavor contrasts
          Poultry: use in omelets, scrambled eggs, chicken salad and to garnish roasted poultry
          Cheese and sausage: serve as a condiment


            About Me

            The pleasure of food, good health and well-being through simple habits for eating well and flexitarian low-key cooking.
            Michele Redmond

            Michele Redmond

            French-trained Chef, Registered Dietitian Nutritionist & Food Enjoyment Activist

            It's about Making Food First

            Get Eat Well Academy periodic updates on easy ways to choose and cook foods that satisfy your appetite, nurture your body and make eating well a pleasure.
            X