
I ate honeycomb for the first time at the Royal Highlands show in Scotland where it was called cinder toffee. I adopted a Scottish accent after the first bite. I’d eaten honeycomb-covered chocolate bars in London, but fresh-made honeycomb had heady aromas of caramel,...
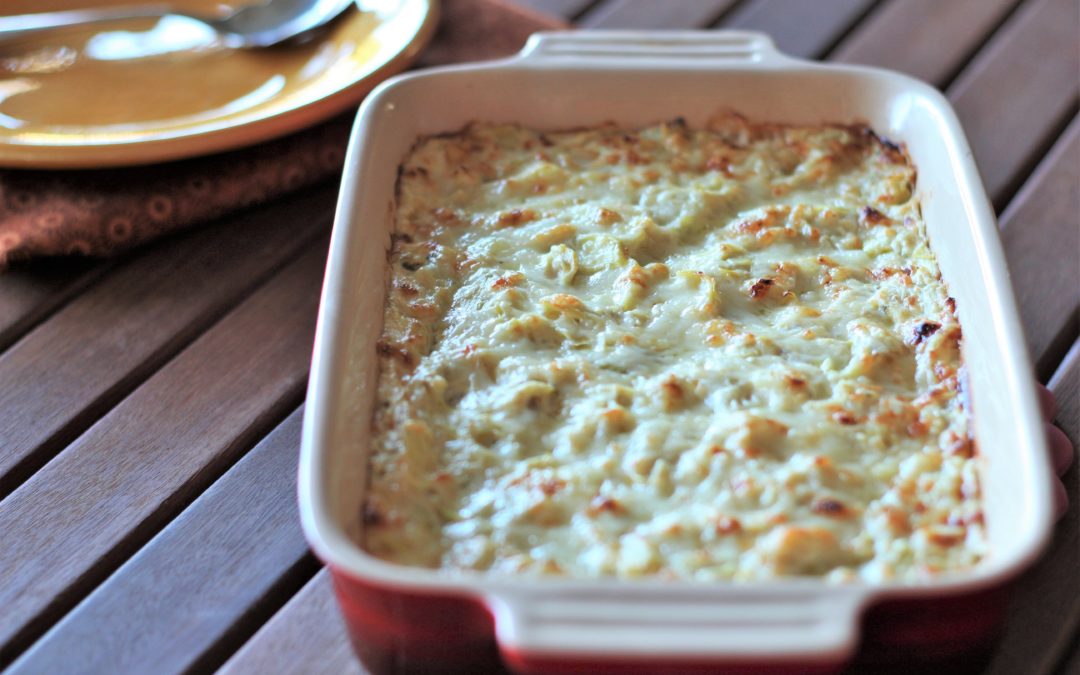
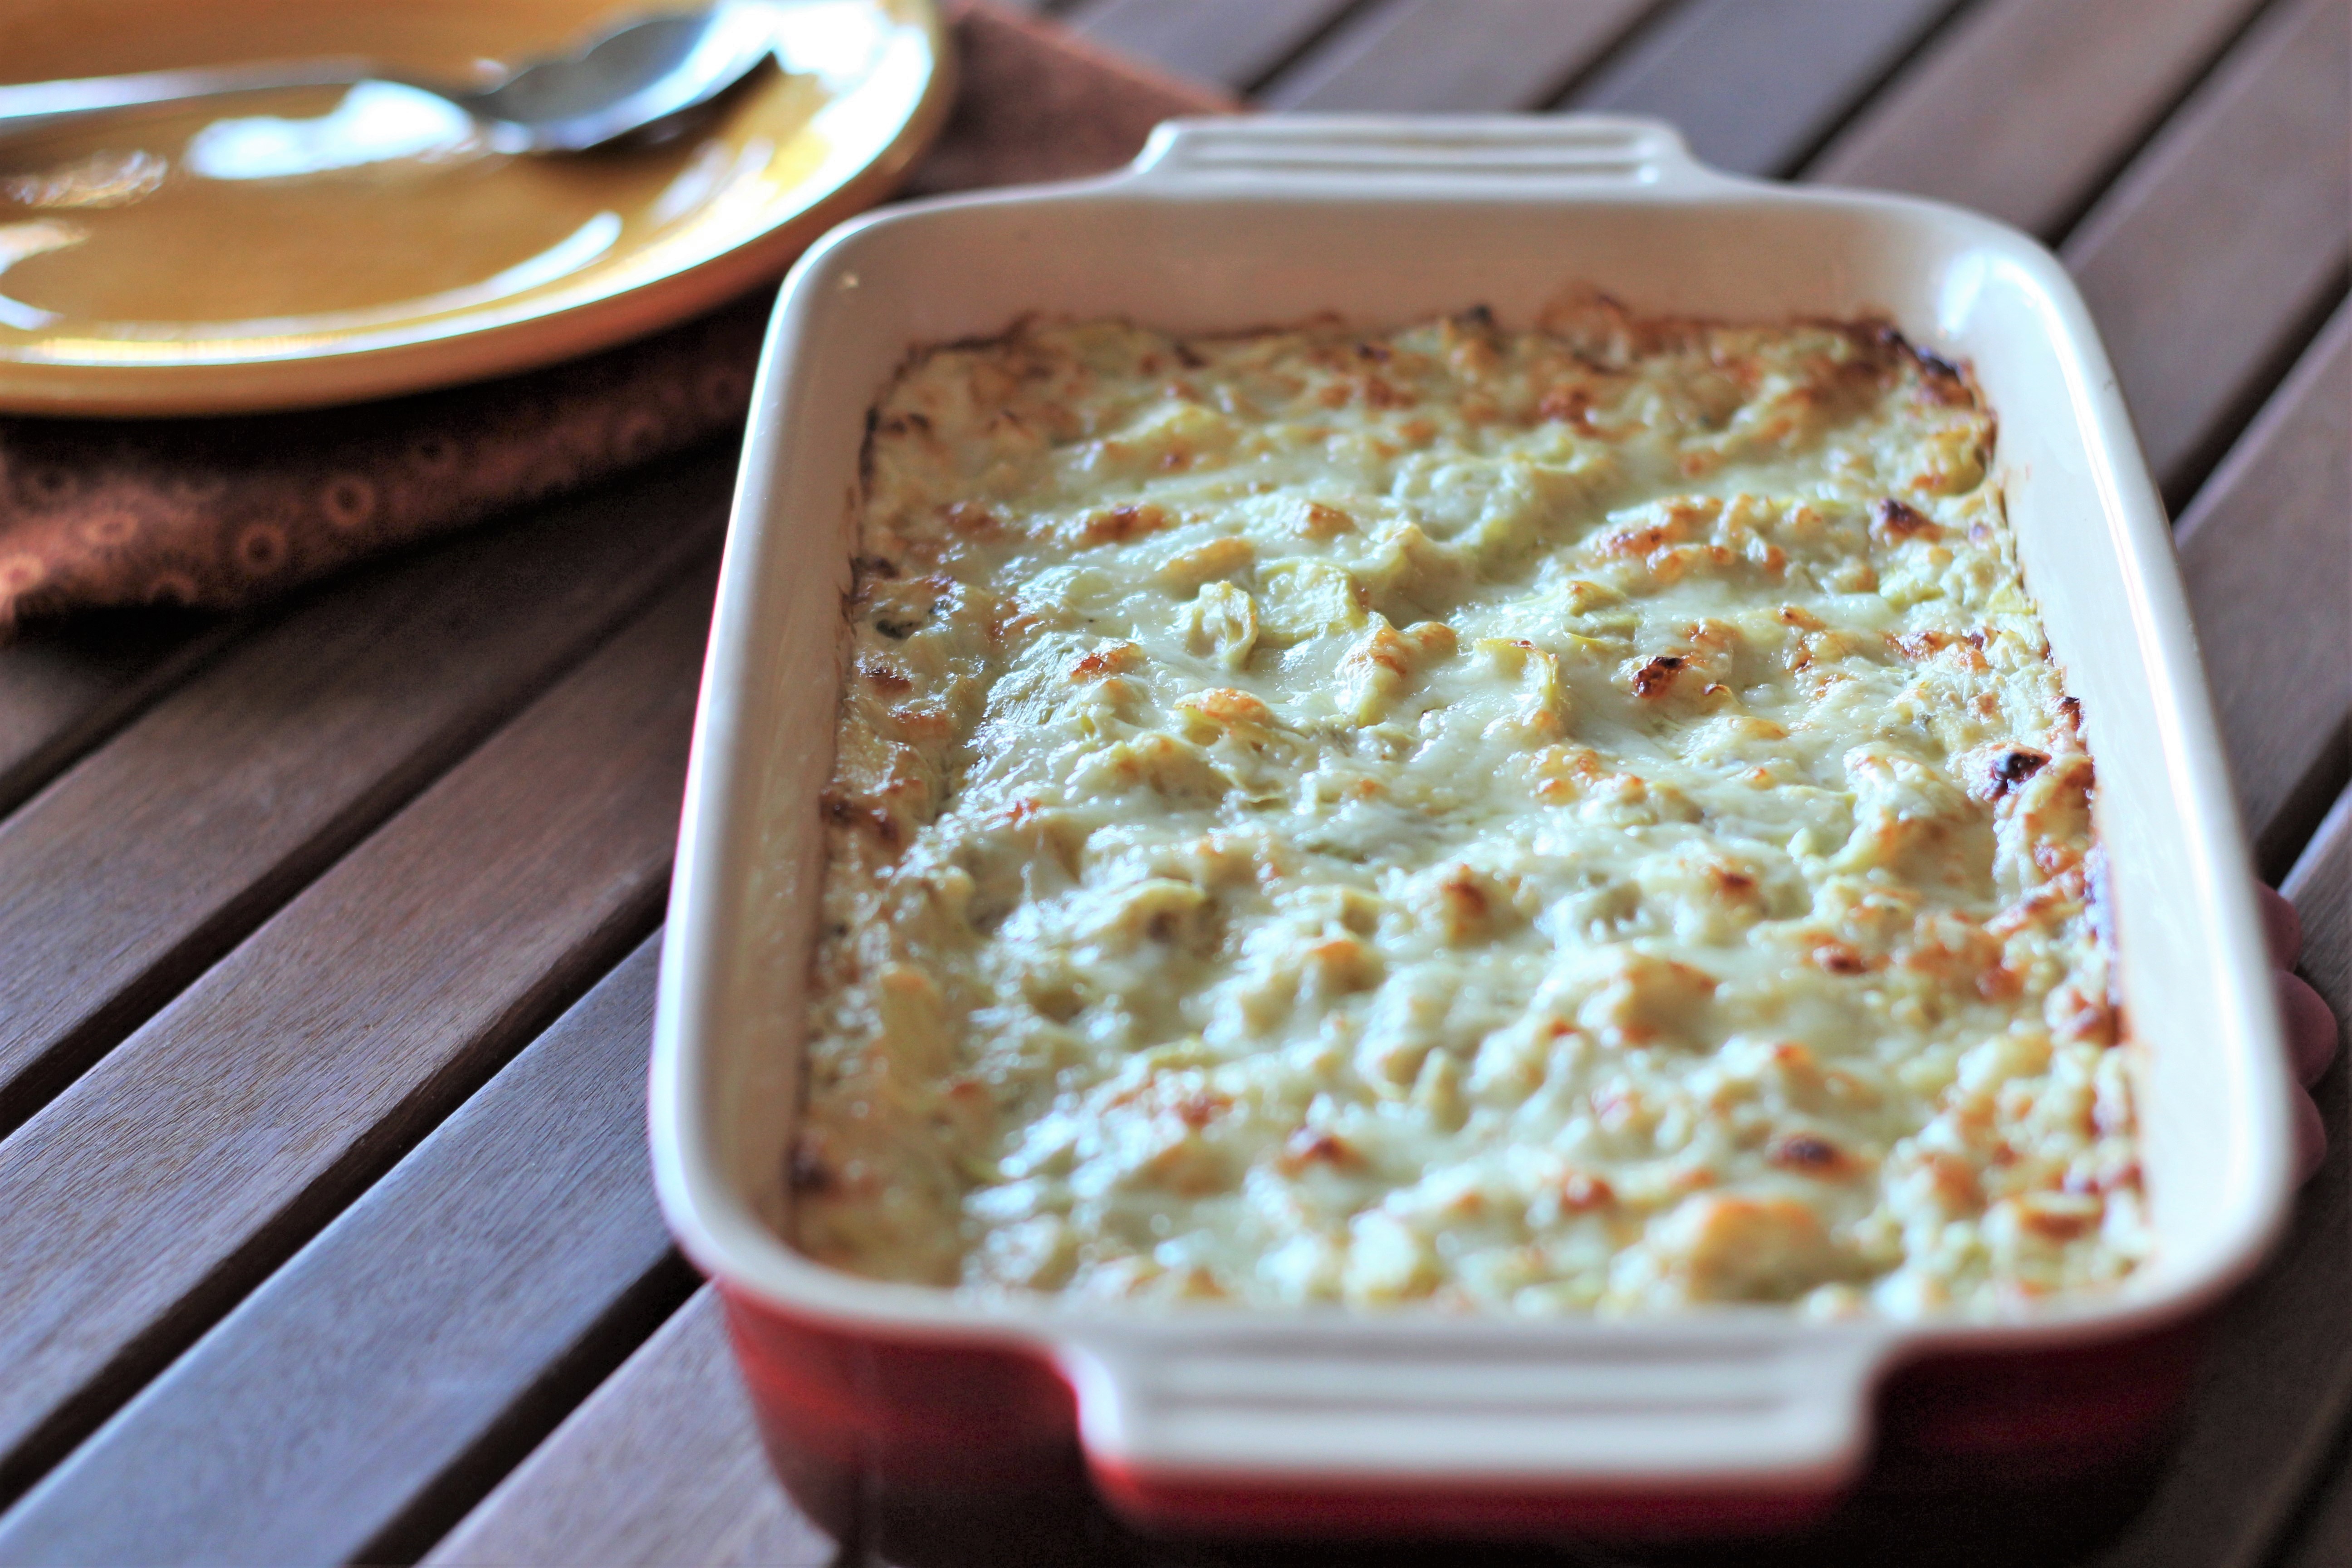
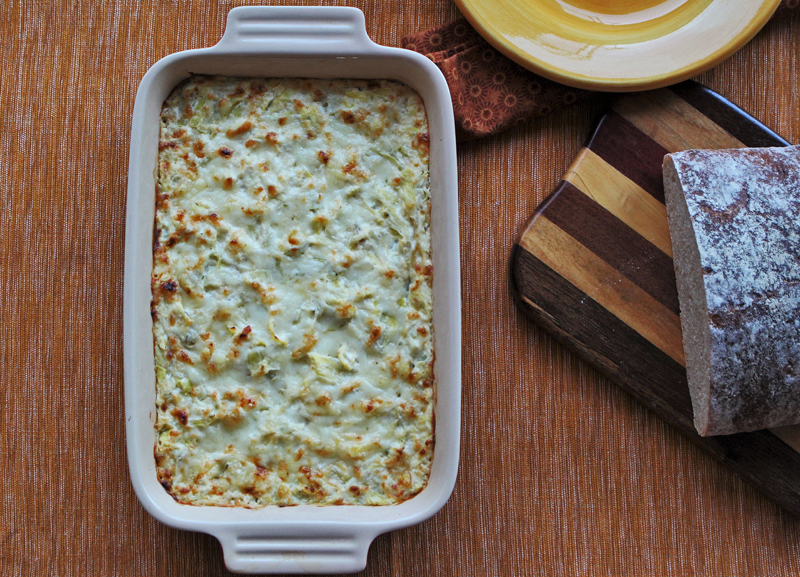
Boursin and Yogurt Artichoke Gratin
Boursin and Yogurt Artichoke Gratin
Boursin and Yogurt Artichoke Gratin
French and American gratins, pronounced “Grawh-tAHn”, range from dense, cheesy and cream-laden to light dishes made simply with a béchamel sauce.This artichoke gratin, satisfyingly filling yet not overly cheesy works well as a dip or topping for a tartine (open-faced sandwich).
The French cheeses used, Boursin and Gruyère, are commonly available in U.S. grocery stores. The unusual gratin ingredient is the Greek yogurt as a complementary creamy element. It also adds a hint of acidity that balances the sweetness of the artichoke hearts.
Yogurt is a source of B-6 and B-12 vitamins, vitamin D, potassium but Greek yogurt offers more protein, a more diverse probiotic profile and is thicker and creamier than most regular yogurt.
Boursin and Yogurt Artichoke Gratin
10-12 servings as an appetizer
Ingredients
- 4 ounces of low-fat cream cheese, softened
- 5.2 ounces (150 grams) herbed boursin cheese, softened (see substitutes below)
- 1 cup low-fat Greek plain yogurt
- ⅛ teaspoon cayenne (too much cayenne can mute the herb flavors)
- 4 ounces gruyère (about 1 ⅓ cups shredded), divided (see substitutes below)
- 2 (14-ounce) cans artichoke hearts, drained
Steps
- Preheat oven to 400°F and adjust a rack to the middle position.
- Place the cream and boursin cheese in a mixing bowl to let them warm up a bit. Shred the gruyère and add to the bowl.
- Drain the artichokes. Squeeze by hand the liquid from the artichokes. Doing this twice works best.
- Once the cheeses are soft enough to mix together with a large spoon, add the yogurt, cayenne, 1 cup of the gruyère (the rest is for a topping) and add the artichokes (break these up between your hands as you add them to the bowl).
- Mix all ingredients and spread mixture in an 8×8” baking dish or gratin dish. Sprinkle on the remaining gruyère and place in oven. Bake for 15 minutes or until bubbling. Turn on the broiler for 2-3 minutes to create a lovely, cheesy crust. Serve hot or warm (see serving ideas below).
Substitution and taste notes options:
- Salt: This is not a missing ingredient! There is salt because the ingredients have enough added sodium to enhance flavors and balance the taste profile.
- Yogurt: Greek yogurt adds tang and a thicker texture than typical yogurt. Often artichoke gratins or dips use lemon juice or zest for a fresh tang, but Greek yogurt does double duty.
- Boursin: This soft cow-milk French cheese is often made with parsley, chives, white pepper and garlic. Or add these ingredients to a soft-style goat cheese.
- Gruyère: A cow-milk cheese that melts well with nutty flavors. Can be replaced by other cheeses that melt well like fontina and have mild flavors. Strong flavored-cheese like cheddar overwhelm the artichoke and herb notes.
Love cheese? Here’s a few notes on enjoying cheese & French cheese passion:
- Top with some Panko or fresh bread crumbs that have been lightly softened with some butter or olive oil for a crunchy bread topping
- Serve as a dip with crackers, crostini or use as a topping for a sandwich tartine
- Toss in 3/4 cup of cooked spinach that has been well squeezed to remove any juices but add just a bit more cheese and yogurt to maintain the gratin texture
“Tout le gratin sera là!” = “Everybody who’s anybody will be there!”
About Me
 The pleasure of food, good health and well-being through simple habits for eating well and flexitarian low-key cooking.
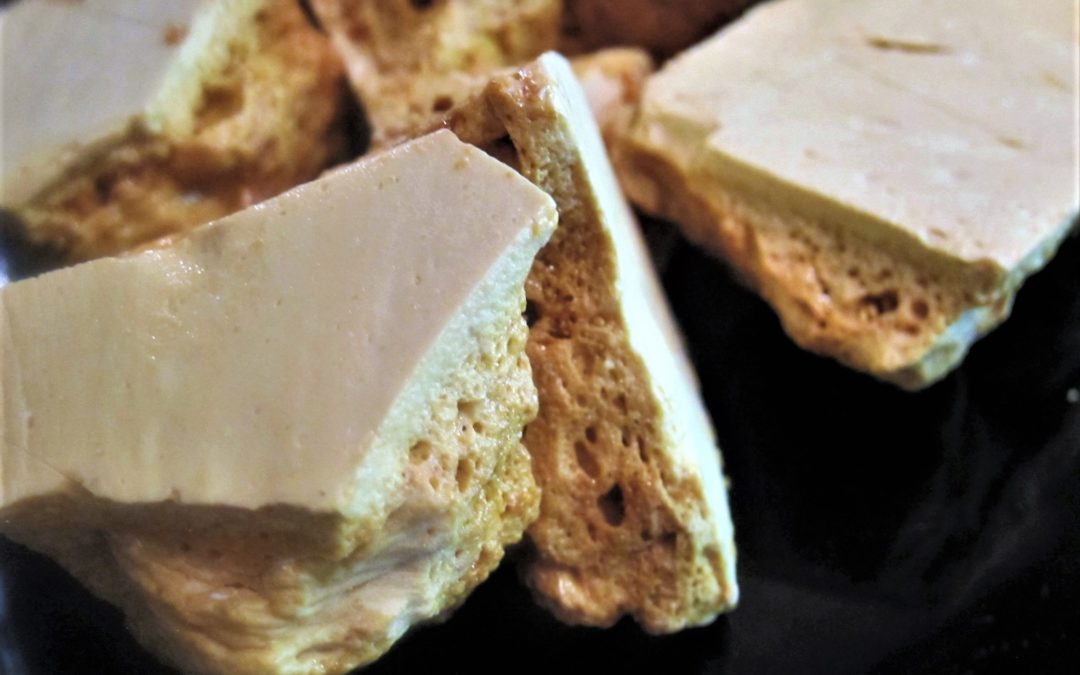
Easy homemade Honeycomb for a Flavorful Sweet Treat

Kids in the Kitchen: A little Cooking Competition is Healthy
Parents rarely get to brag that their children regularly make the family meals using lots of new ingredients. However, TV cooking competitions for kids give the illusion that they often whip up complex meals quicker than their parents can google the recipe....

Marmalade Macaroons or Rochers à la Noix de Coco
Add macaroons to your dessert menu to master a classic French treat with Italian origins that’s surprisingly quick and easy. Macaroons (mac-uh-ruinz) based on coconut, look and sound nothing like the butter-cream filled almond cookies macarons (mac-kaw-rhone...
Michele Redmond
French-trained Chef, Registered Dietitian Nutritionist & Food Enjoyment Activist
It's about Making Food First
Get Eat Well Academy periodic updates on easy ways to choose and cook foods that satisfy your appetite, nurture your body and make eating well a pleasure.