I ate honeycomb for the first time at the Royal Highlands show in Scotland where it was called cinder toffee. I adopted a Scottish accent after the first bite. I’d eaten honeycomb-covered chocolate bars in London, but fresh-made honeycomb had heady aromas of caramel,...
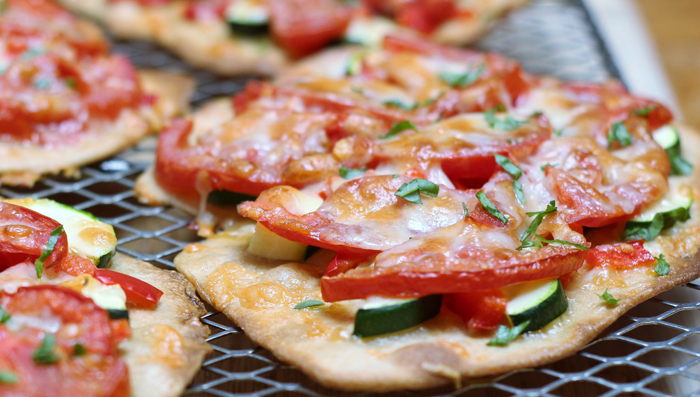
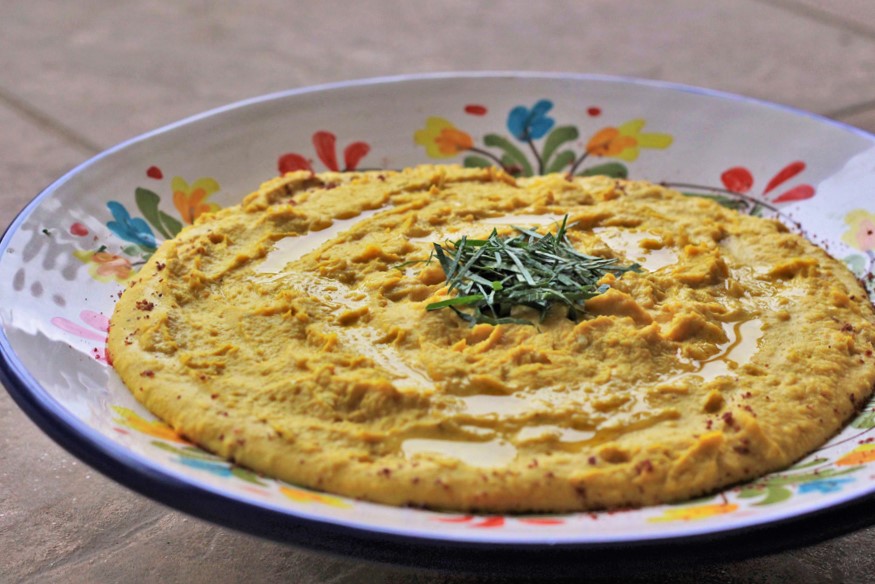
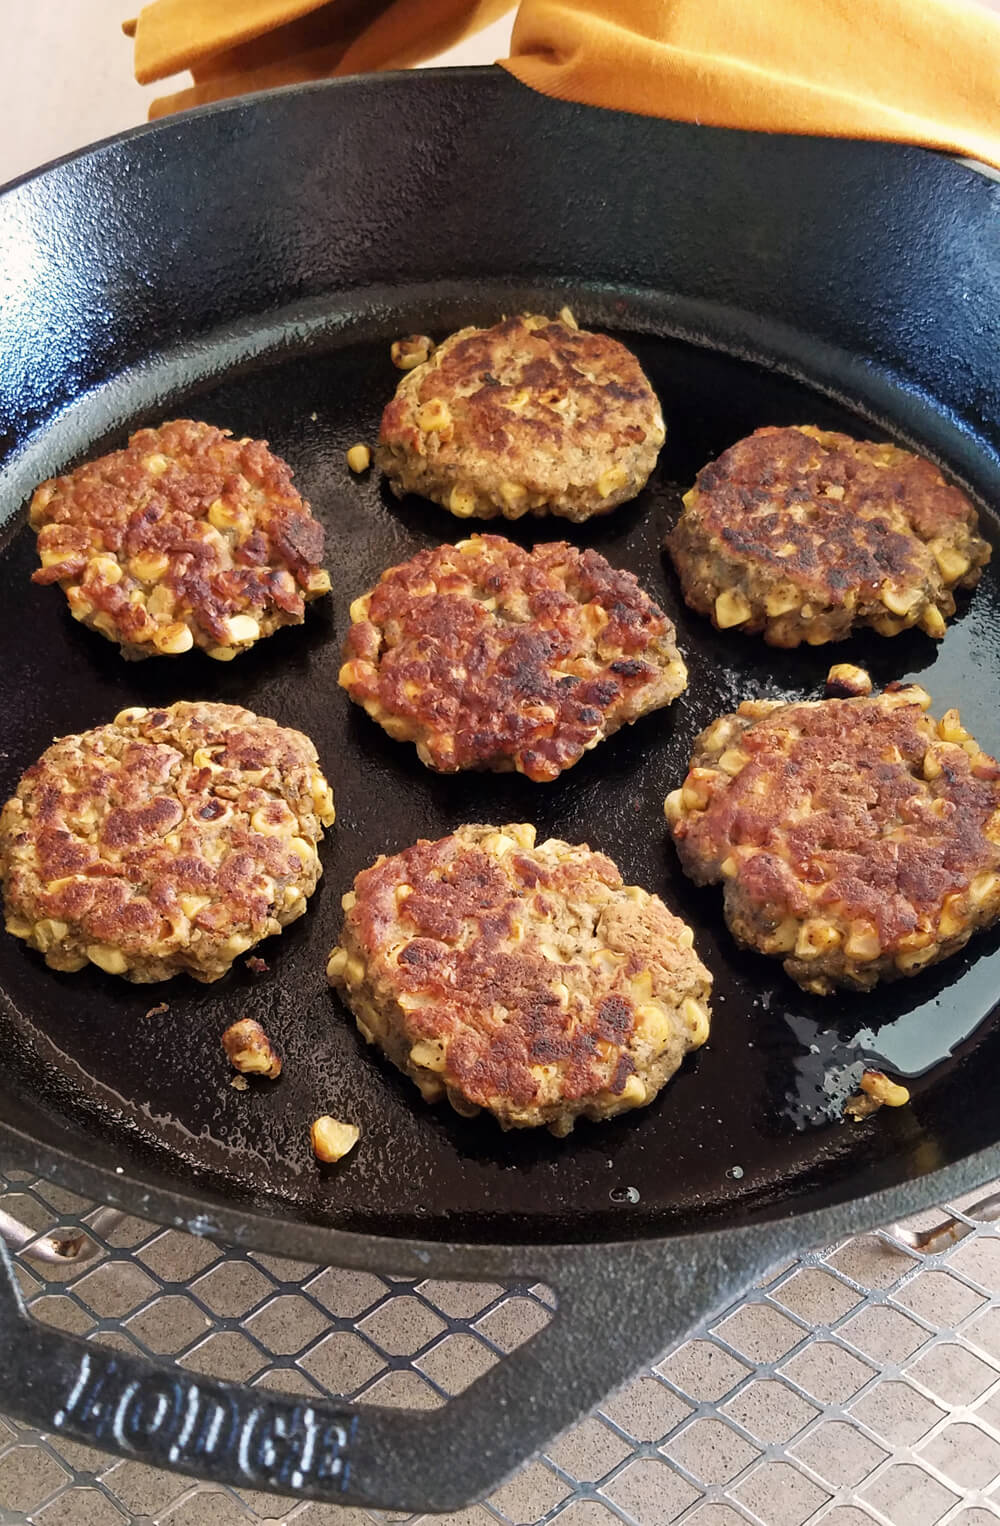
Chickpea Corn Cakes: Crave-worthy Carbs
Chickpea Corn Cakes: Crave-worthy Carbs
If you enjoy crunchy, sweet summer corn and savory, nutty chickpea flavors and a fast, easy recipe, continue. However, I feel compelled to defend corn just in case with this comment:
Carby chickpea corn cakes cause carb-avoiders cringe-worthy concerns, or conversely, conscious cravings. Now breathe.
Corn often gets dissed as low-nutrient, high-starch food, but this oversimplifies corn’s dietary profile.
Instead corn’s a good source of fiber, micronutrients and minerals that connect to health benefits.
As for corn cravings, sweet corn is a comfort food that connects us to summer and chowing down on a cob is just plain fun. Corn’s also a good source of umami offering savory, meaty flavors.
The Chickpea Ingredient
The chickpea in this recipe is from chickpea flour (besan or gram flour), a nutrient-rich, gluten-free flour. In these egg-free corn cakes, the sticky bean flour is a primary binding agent.
Enjoy corn cakes as an appetizer with a dollop of lemon yogurt sauce, garlic and walnut herb sauce or a salsa or as a dinner with a side salad.
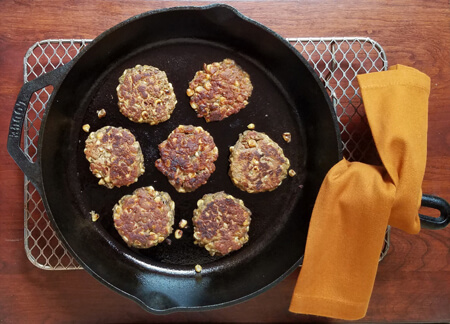
Chickpea Corn Cakes
Yield: Makes 18-20
Ingredients
4 ears of corn (about 2 pounds trimmed or about 3 cups of kernels)
1½ cup chickpea flour
⅓ cup sweet rice flour
1 teaspoon baking powder 1 teaspoon fine sea salt
2 tablespoons ground sumac (a citrus-like flavor, but is optional)
¼ teaspoon cayenne pepper (or ½ teaspoon for more hint of heat)
¾ to 1 cup water
1 large shallot, minced (about ⅓ cup) (or ¼ of a small yellow onion)
4 tablespoons organic canola oil
Prep Steps
- Shuck corn if needed, cut off kernels (hold stalk upright in the center of a tea towel and use a chef knife to strip off kernels). If using canned corn, drain and pat dry the kernels.
- In a bowl, stir together chickpea flour, rice flour, baking powder, salt, sumac and cayenne.
- Add water, shallot and corn. Mix with a spoon until blended. If not using immediately, refrigerate for 20 minutes or overnight to make forming patties easier.
- Form palm-sized patties about 1/2” thick with an even surface for nice browning. In a large skillet, heat the oil over a medium-heat burner until it shimmers. Add patties leaving space between them, cook until each side is a dark brown color. Place on paper towels and repeat.
- Serve hot or at room temperature—see serving ideas below.
Serving Ideas & Nutrition Bonus:
Serve with dips sauces or topped with tangy Greek yogurt, Garlicky cheese-free pesto or a chunky-tomato ragout.
Nutrition bonus: for 4 corn cakes: Fiber 9 grams (woohoo) and 10 grams protein for only 236 calories
Like Chickpea flour? Also try my Chickpea shrimp fritters
Like the pan? I don’t represent Lodge cast iron, but do recommend them: more info here
About Me
 The pleasure of food, good health and well-being through simple habits for eating well and flexitarian low-key cooking.
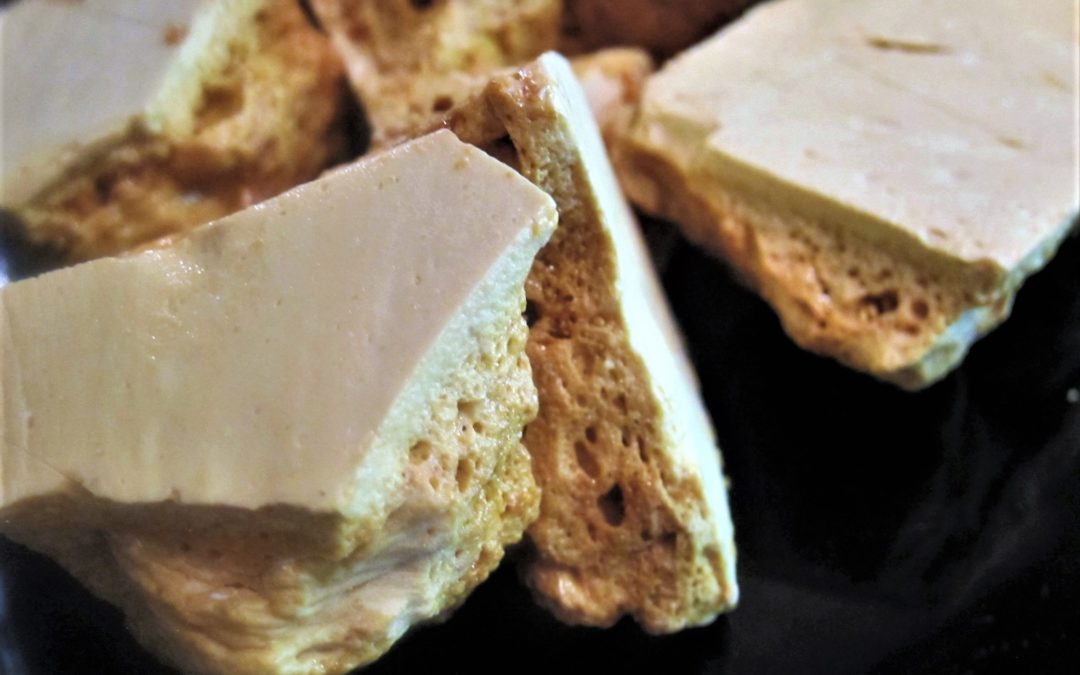
Easy homemade Honeycomb for a Flavorful Sweet Treat
Kids in the Kitchen: A little Cooking Competition is Healthy
Parents rarely get to brag that their children regularly make the family meals using lots of new ingredients. However, TV cooking competitions for kids give the illusion that they often whip up complex meals quicker than their parents can google the recipe....

Marmalade Macaroons or Rochers à la Noix de Coco
Add macaroons to your dessert menu to master a classic French treat with Italian origins that’s surprisingly quick and easy. Macaroons (mac-uh-ruinz) based on coconut, look and sound nothing like the butter-cream filled almond cookies macarons (mac-kaw-rhone...
Michele Redmond
French-trained Chef, Registered Dietitian Nutritionist & Food Enjoyment Activist
It's about Making Food First
Get Eat Well Academy periodic updates on easy ways to choose and cook foods that satisfy your appetite, nurture your body and make eating well a pleasure.